 Skip to main content
Beginners guide to: Narrow Band Imaging
Astro Imaging using narrow band filters is a popular and interesting part of our hobby. It allows us to take images comparable to professional observatories; from light polluted suburban locations and offers the opportunity to become creative with our images as processing produces stunning results.
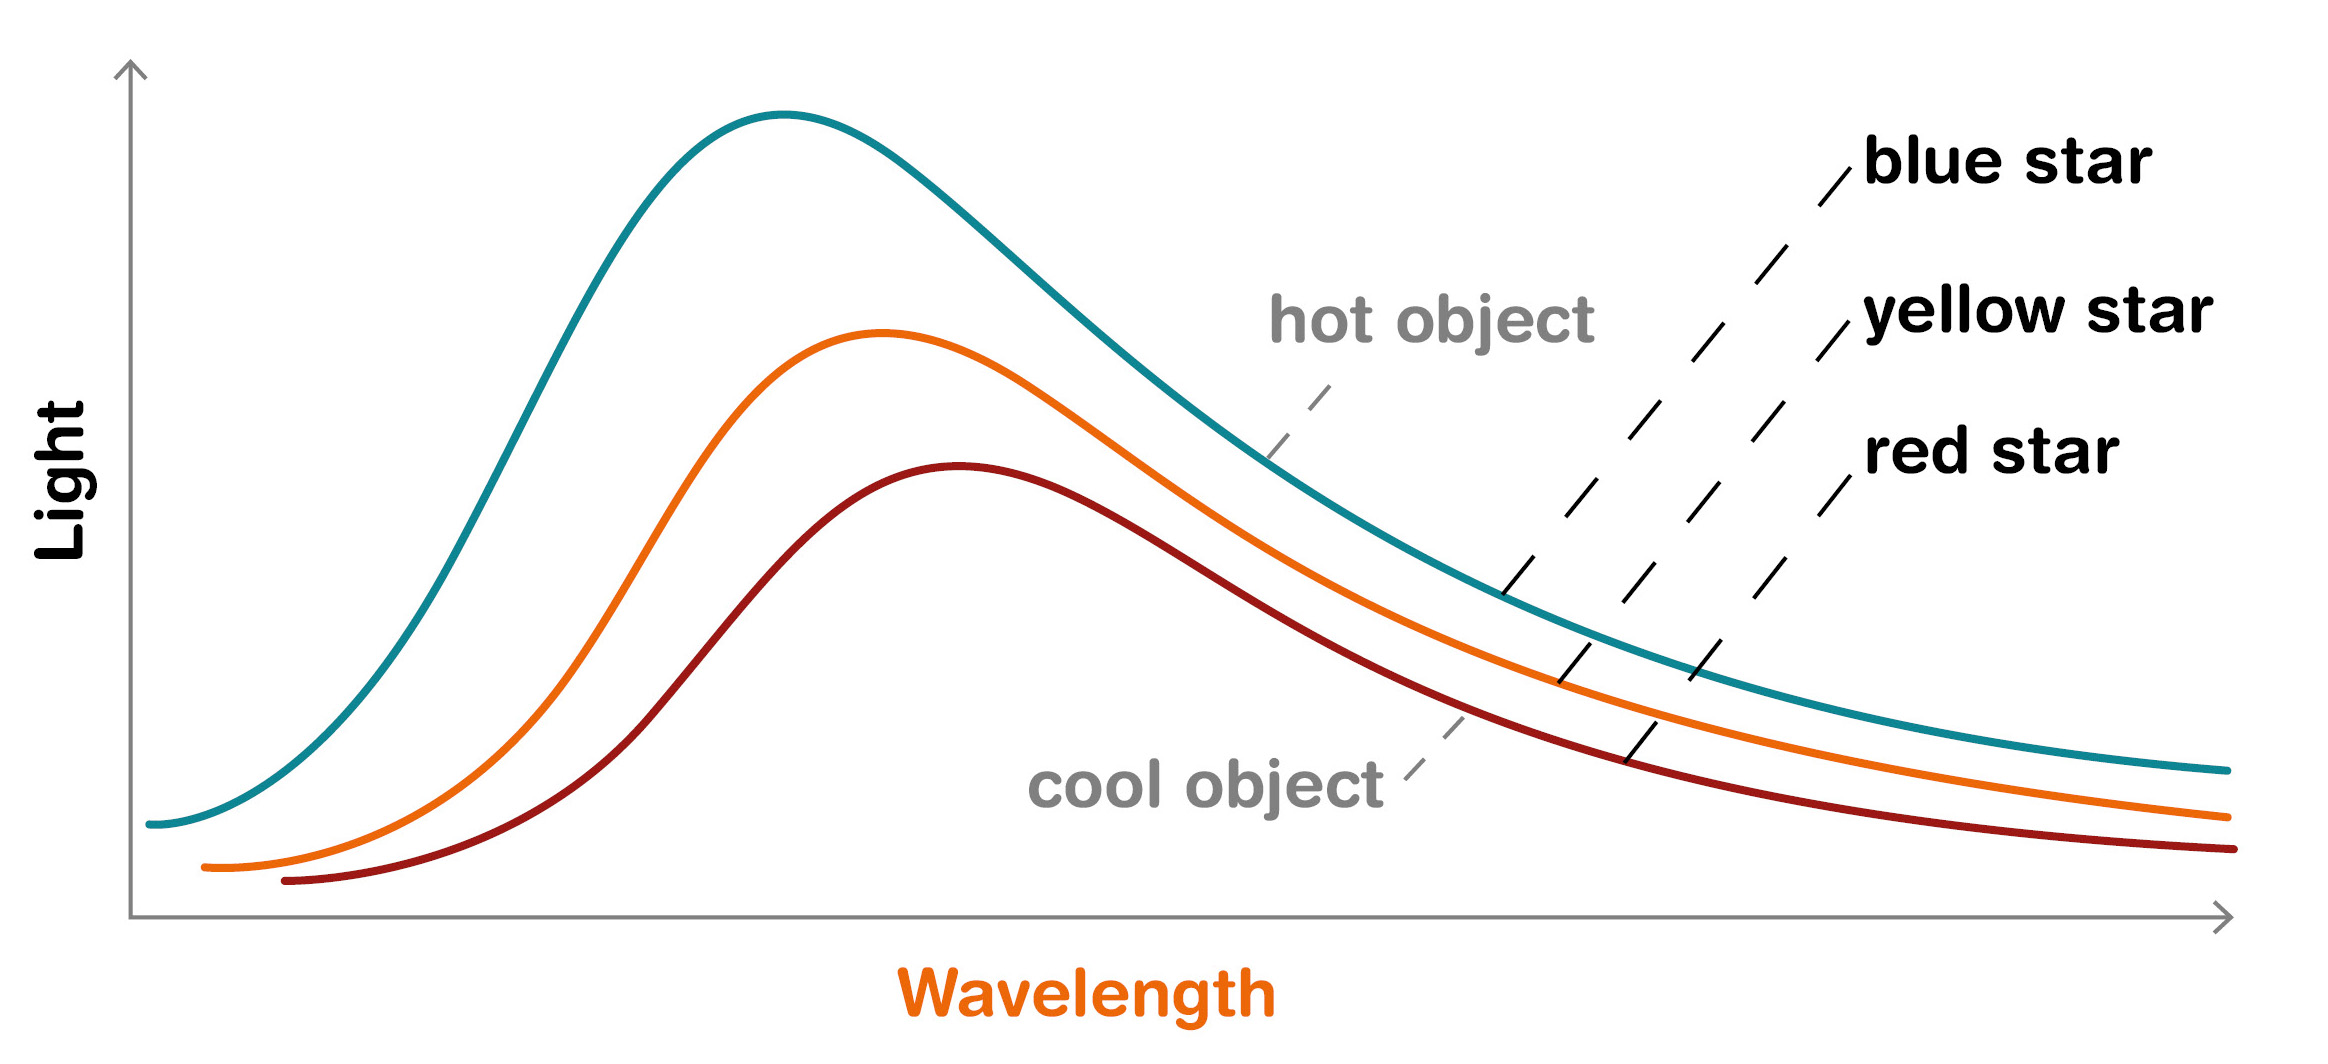
Before we launch into the practicalities let’s take a couple of paragraphs to consider what we will be imaging. Light emitting objects come in two types, the most familiar are broad band emitters whose light covers a wide range of wave lengths. This includes stars, galaxies and reflection nebulae. The colour of the object is related to the peak of the emission, which is in turn related to the temperature of the object.
Conversely narrow band emission is what make emission nebulae and planetary nebulae glow. The mechanism here is not thermal but caused by electrons absorbing energy, becoming excited and then releasing that energy. Hydrogen is by far the most common element in the universe comprising more than 2/3rds of normal matter. Electrons associated with the hydrogen nucleus populate orbits around the nucleus. However only certain orbits are allowed, these are termed z=2 (lowest energy), Z=3 (next lowest) etc. If an electron absorbs energy from a high energy photon it can move to a higher energy orbit or be removed from the hydrogen nucleus all together (ionisation). These free or excited electrons will then move back to lower energy orbits and in so doing release the surplus energy they have. As only certain energy levels are possible, the energy released from moving between the orbits is also limited to certain values (quantised).
The energy is released as a photon with a certain energy. As the energy of the photon determines its wavelength, only certain wavelengths are possible.
A decay from n3 to n2 results in a photon of 656nm (Hydrogen Alpha)
A decay from n4 to n2 results in a photon of 486nm (Hydrogen Beta)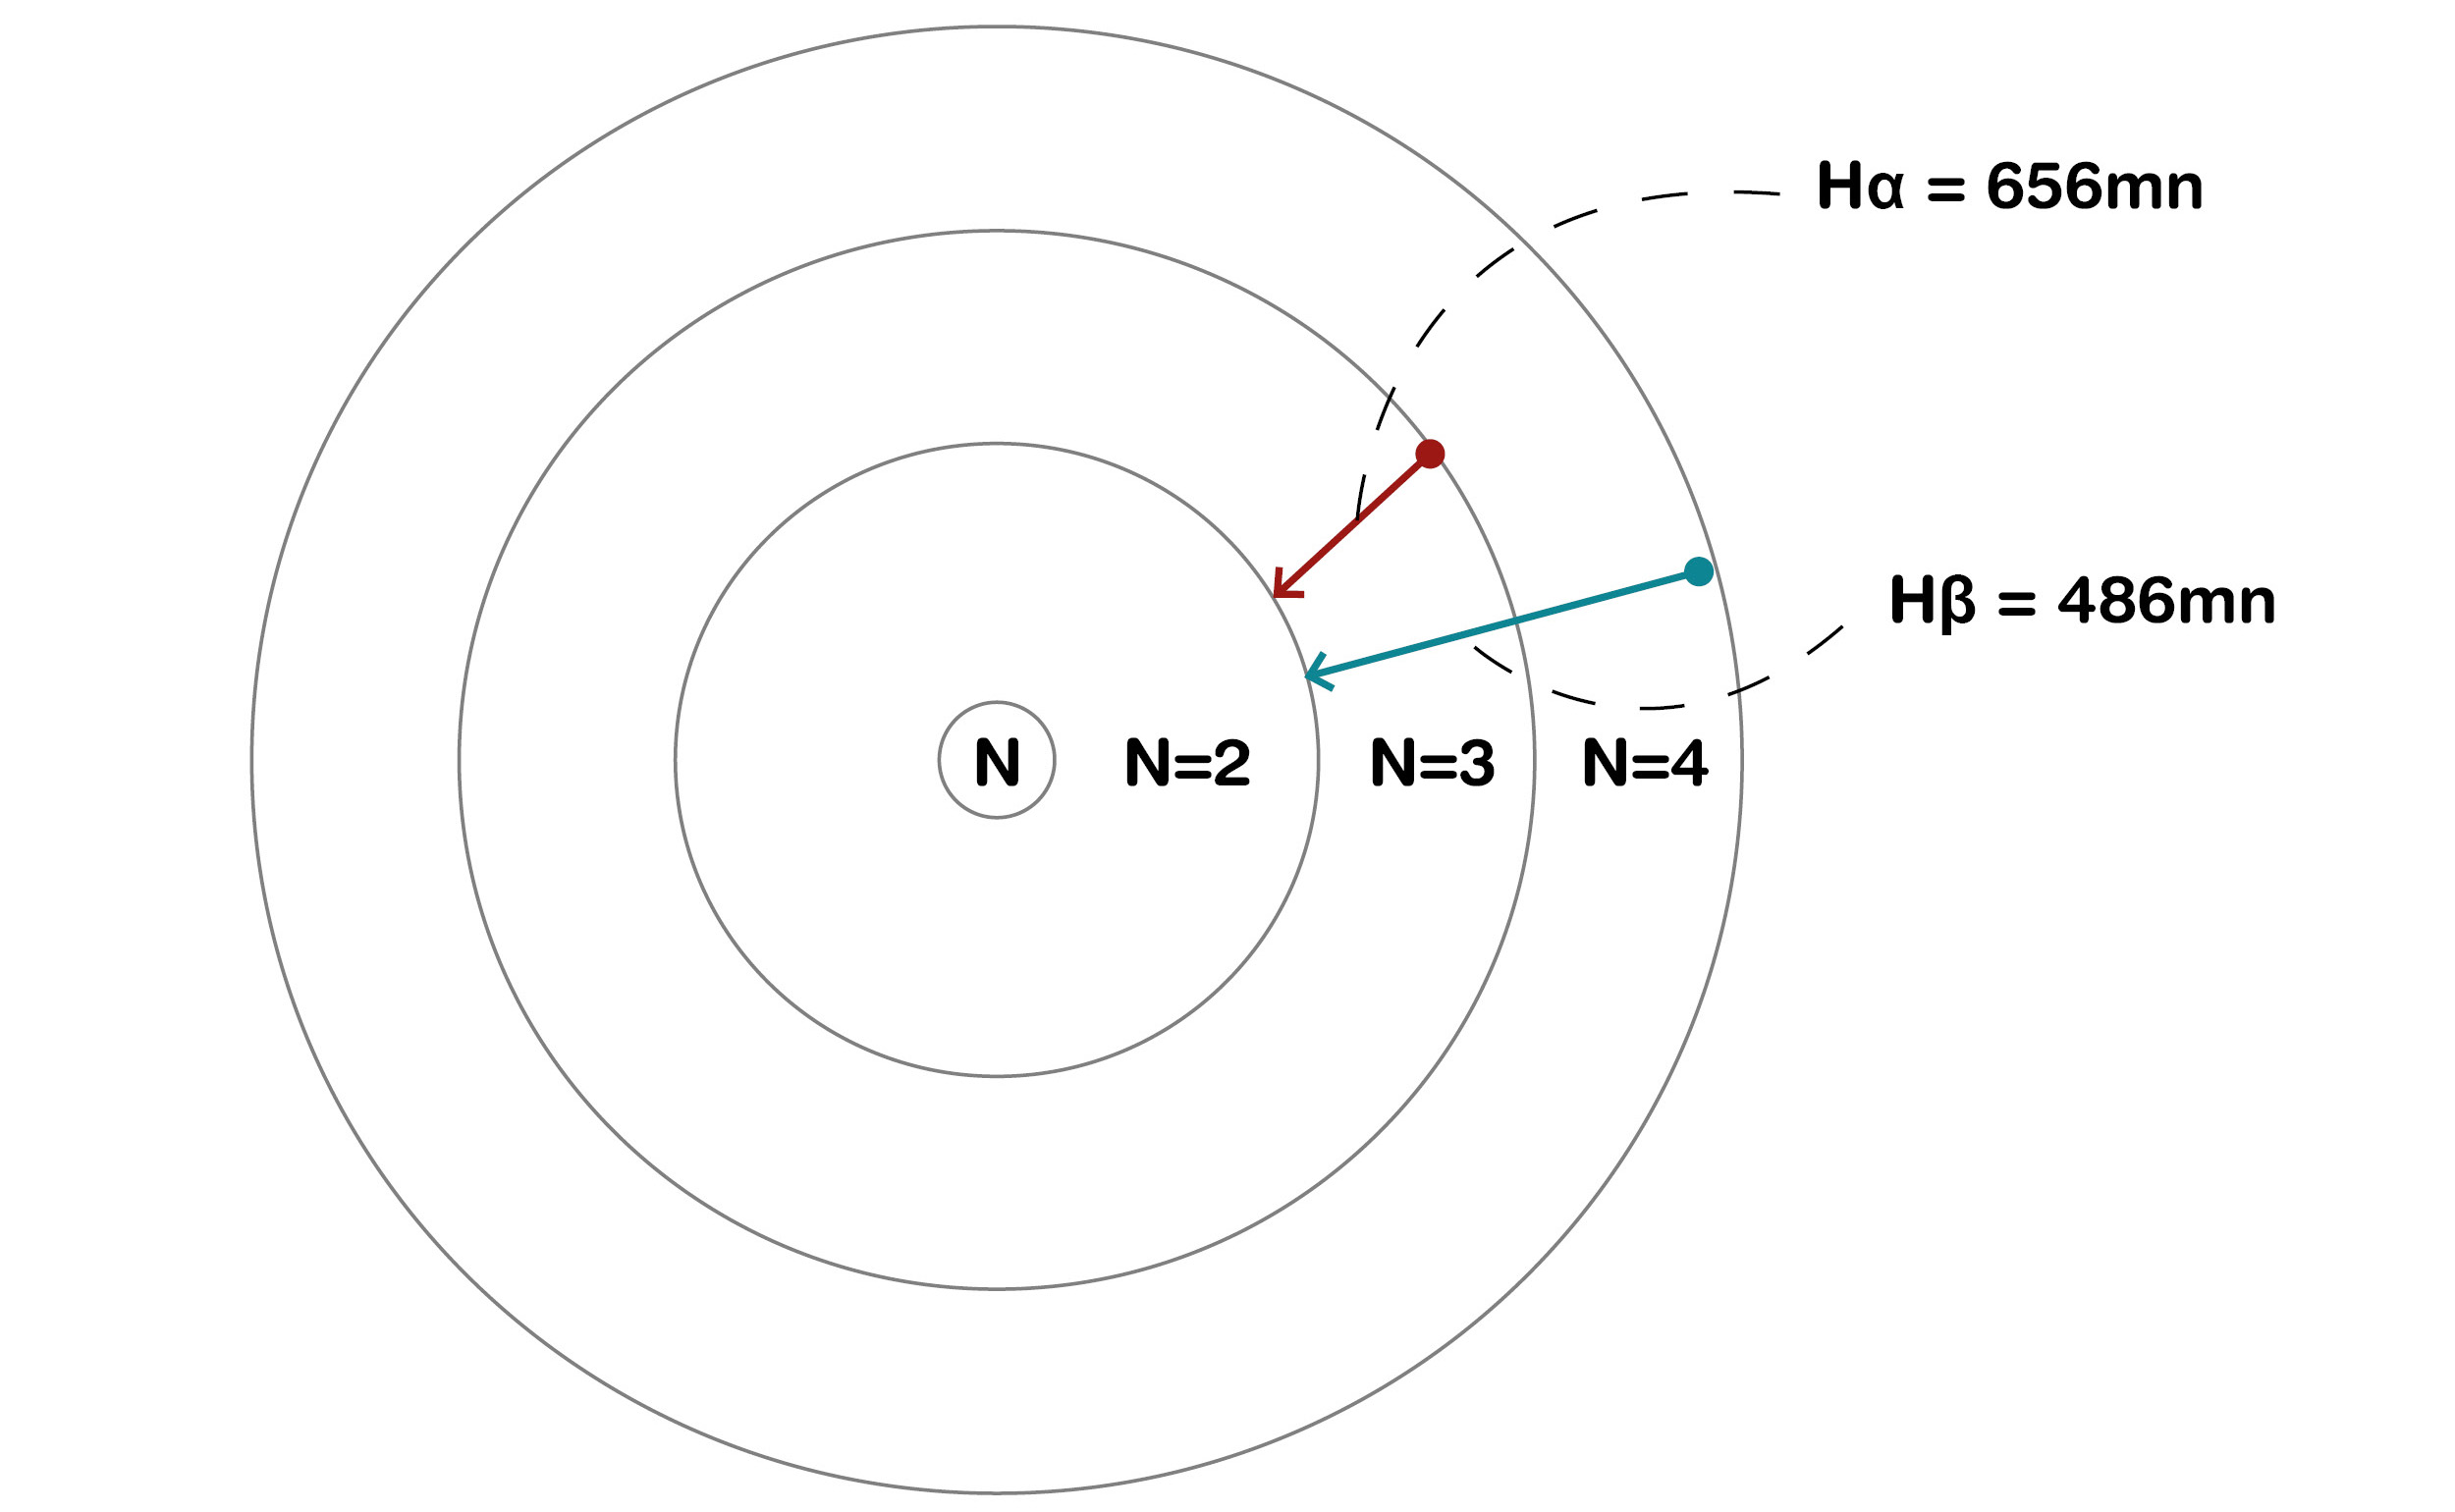
In order for us to see an emission object we need a source of high energy light to excite atoms and atoms to be excited. Most commonly this is found in areas of star birth where hot young stars shine brightly in the UV part of the spectrum and lights up the surrounding gas and dust. Good examples are the Orion and Rosette Nebulae.
The other type of object comes from the other end of stella evolution. Planetary nebular are formed when an old star throws off its outer layers which is then illuminated by then inner core of the star. The dumbbell nebular is a nice example of this type. More dramatic are super nova remnants. Here the dying star is blown to pieces and the ejected material lit up by the white dwarf or black hole that forms at the centre. The crab nebular and the veil nebular complex are good examples of this.
To image these objects all we need is a camera and telescope however the use of a narrow band filter is a great advantage. The reason for this is the filter will allow all the light from the nebular to pass through while blocking out the background light pollution or sky glow.
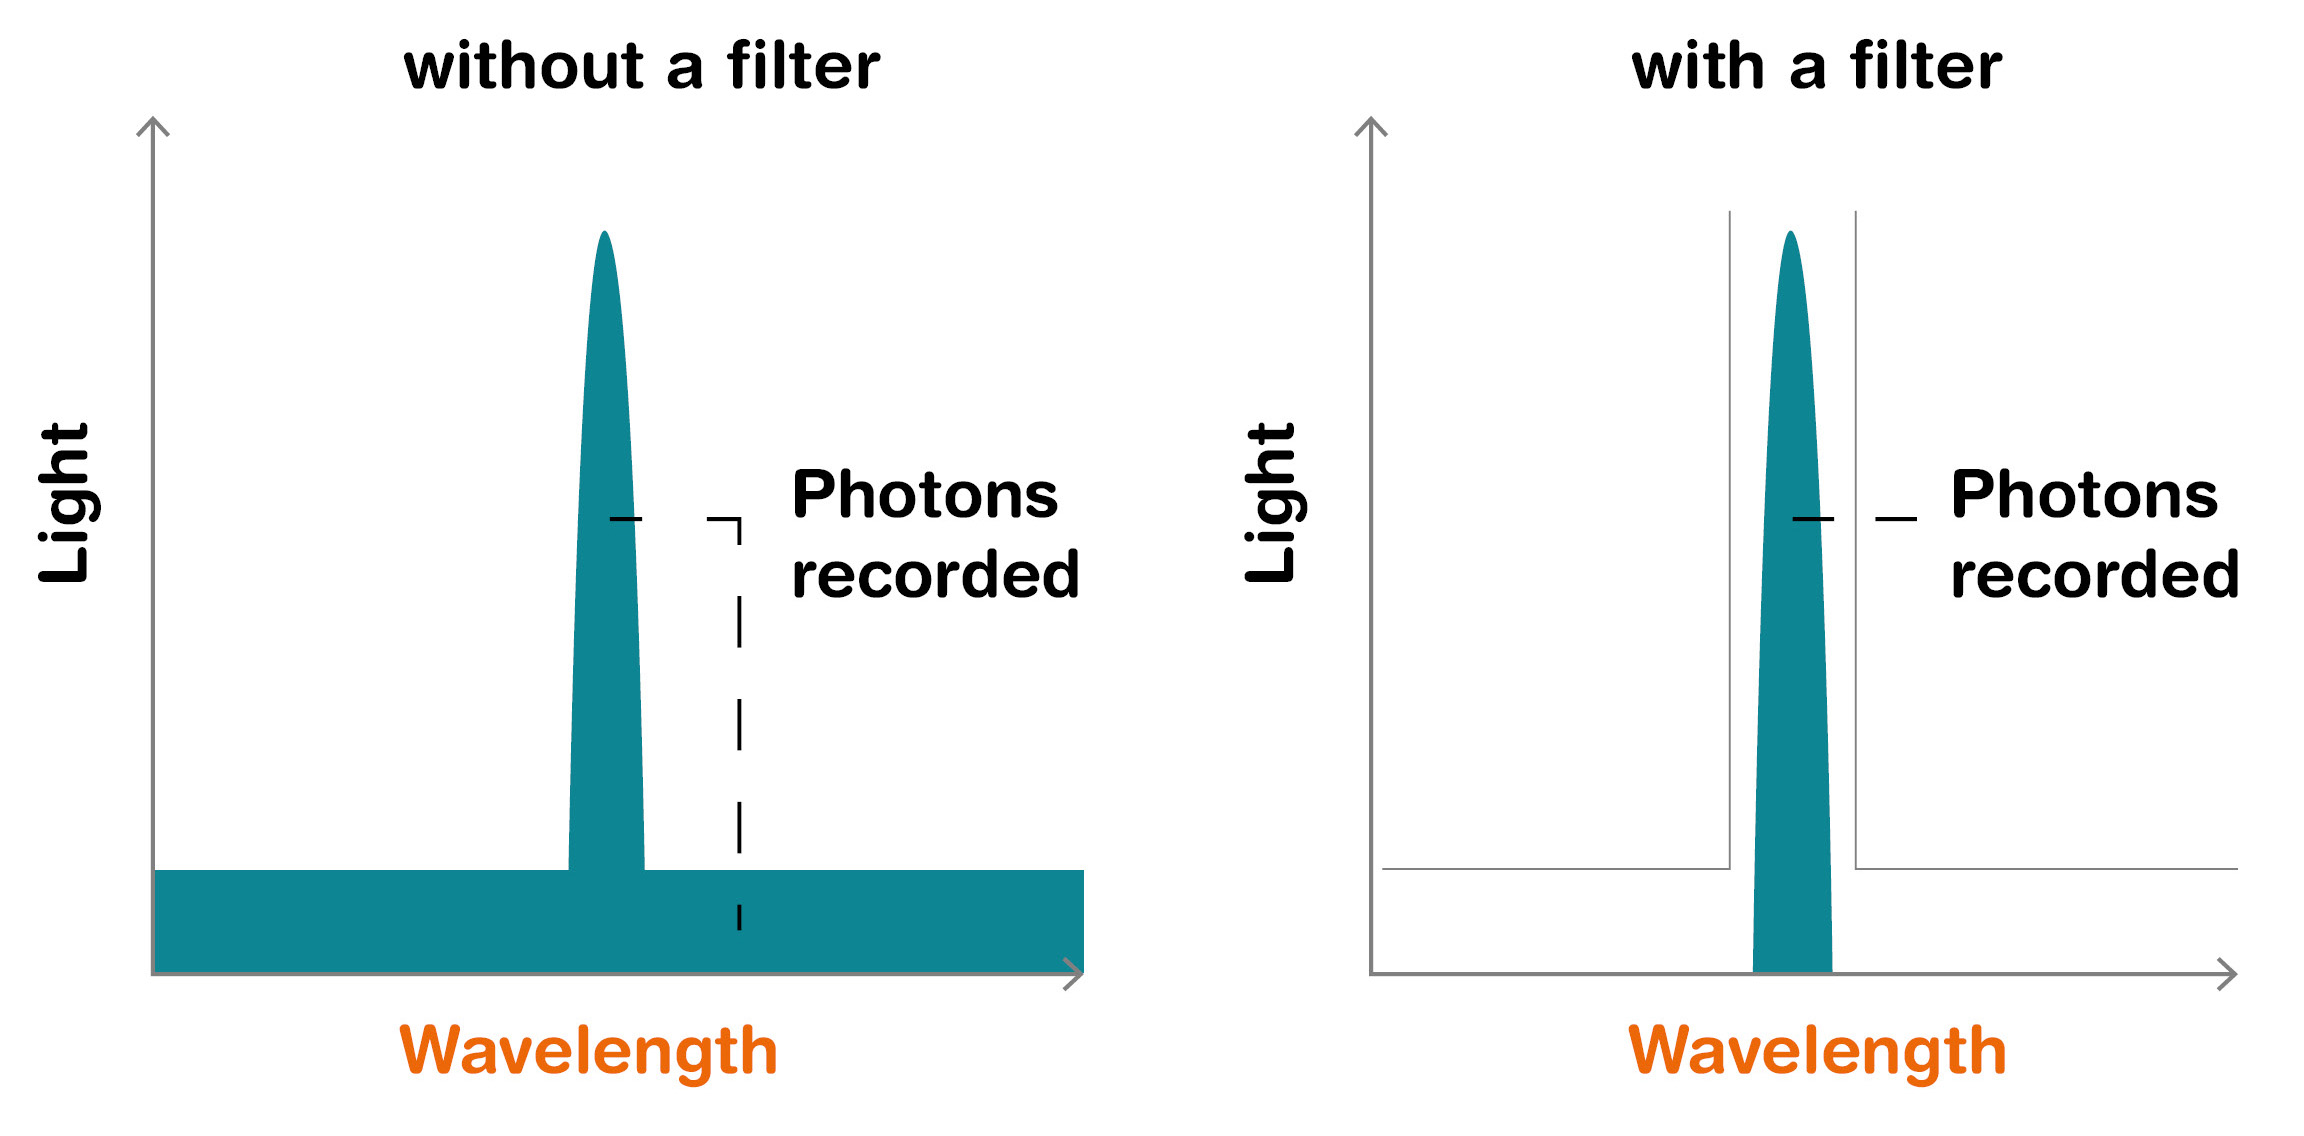
Without the filter the camera will record photons coming from the object and other sources resulting in a low signal to noise image. A narrow band filter can have a band pass of just a few nm meaning that while it lets in all the nebular photons through, the vast majority of the broad band light pollution is stopped. The result is a much higher signal to noise.
Images taken with a hydrogen alpha filter generally show lots of detail in the nebular and have very small stars as most of the star light is blocked. This can be very atmospheric. When processed people tend to leave them as black and white images or give then a red hue.
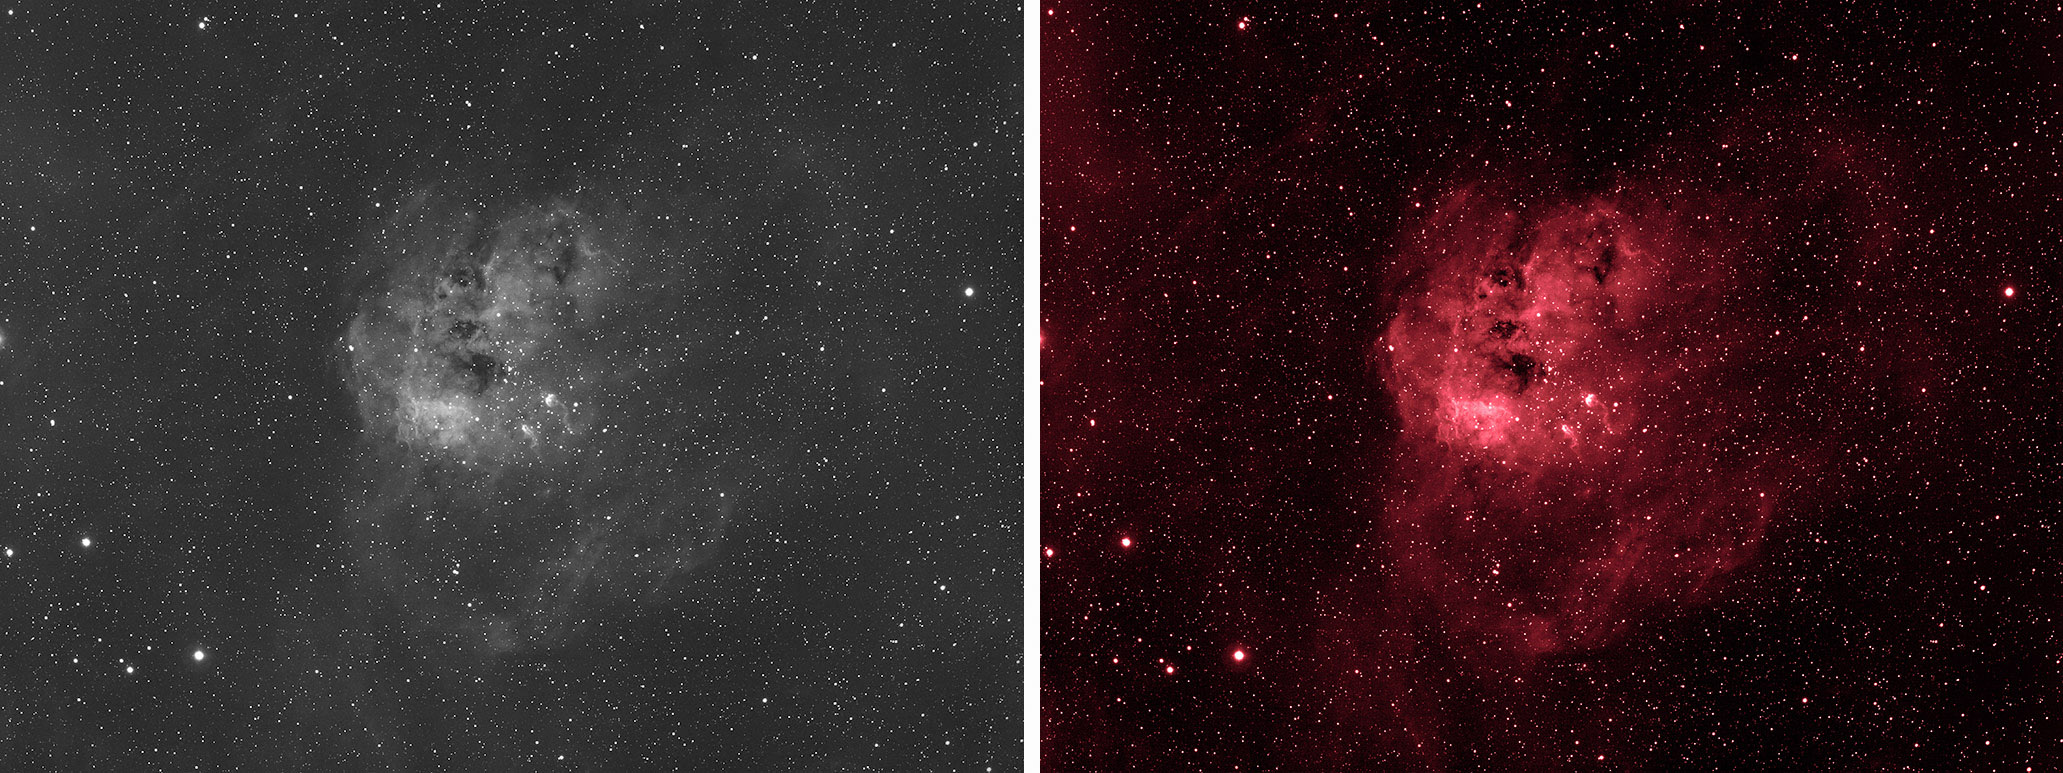
As seen below left: is a grayscale image of IC410 in Ha and right: the image with edited in photoshop curves to show the Ha in red).
As well as Hydrogen alpha filters amateur astronomers can also buy Sulphur II, Oxygen III, Nitrogen I and Hydrogen Beta filters. Imaging an object through different filters gives us the opportunity to create colour images by assigning the signal from different filters to different channels. After Hydrogen Alpha, Oxygen III is the next strongest signal. As Hydrogen and Oxygen tend to be disbursed differently throughout an object a lot of structure becomes visible with the second filter. A particularly good example of this bicolour imaging is the Veil and Dumbbell Nebulae.
The next filter that is normally added to the mix is sulphur II. The normal way of mapping Ha, OIII and SII to the RGB colour channels is Ha to green, OIII to blue and SII to red. This is known as the Hubble pallet and made famous by the Hubble Space Telescope’s image of the Pillars of Creation.
Pillars of creation
Sadly there is a lot less sulphur signal than Ha or OIII so colour balancing for us amateurs is difficult. Without scaling the Ha signal dominates giving an anaesthetic green nebular. There are many Photoshop tutorials on the web explaining how to produce images that look similar to Hubble ones. One that I like is by Bob Franke

Above is the famed image from the Hubble telescope of the Pillars of Creation in the Hubble palette, right is our image of IC 410 (as above in Ha) edited in the Hubble palette using HSO (Red = Sulphur, Green = Hydrogen Alpha and Blue = Oxygen)
Other narrow band filters include Nitrogen I and Hydrogen Beta. As Hydrogen Beta emission is often co-located with Hydrogen Alpha not much new structure becomes evident but it can provide pleasantly coloured images with better signal than if SII had been used.
Nitrogen I is only rarely used but can be effective in super nova remnants.
Finally it’s worth mentioning astrophotography cameras. While all cameras can be used for narrow band imaging monochrome cameras tend to be better than one shot colour. This is because of the Red, Green, Blue filters on the surface of the sensor of a colour camera. So when imaging through Hydrogen Alpha all the monochrome cameras pixels record the transmitted light. However for a colour camera only the red pixels can record the Ha signal. As only ¼ of the pixels are red this limits the sensitivity of the colour cameras.
To Conclude. Narrow band imaging is an exciting part of modern astronomy and offers the possibility to beat light pollution and get creative with our image processing.
Tips for imaging with narrowband filters for beginners.
Emission nebula and planetary nebula both respond well to imaging with Ha and OIII; and SII to a lesser extent which is why you often see images shared that only have Ha and OIII content mapped as Ha (Red) OIII (Green) and OIII again (Blue).
Hydrogen beta (Hb) is also present in emission nebulae and can be used as a ‘blue’ channel.
Planetary Nebulae are particularly rich in sources of OIII emissions.
Galaxies are not suited to being captured in narrowband only, but capturing them in LRGB or RGB and adding Ha to red will dramatically brighten their active regions, likewise adding Ha to red in nebula has a dramatic effect on a emission nebulae captured with LRGB.
The biggest difference is the length of sub-exposures (subs) you need to take in LRGB imaging is approximately 2-5 minute subs, for narrowband you should try least 5 – 20 minutes per sub.
Try your hand at using different palettes and don’t forget to enter them in to our 2018 Astrophotography competition