 Skip to main content
Now that we’re heading towards shorter nights in the Northern Hemisphere, it’s good to do some easy imaging. The moon is a great target. It’s large enough to contain great detail, and bright enough so that exposures can be short. However moon pictures can get a little samey, so here are a couple of ideas to mix things up a bit.
The Moon in Colour
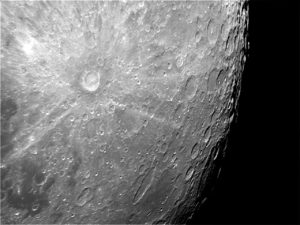
Looking at the moon, it’s easy just to believe that it’s all just shades of grey with very little colour present… and you would be very nearly right. What little colour there is comes from the older surface being turned very slightly brown/orange by continued exposure to sunlight over millions of years. The moon’s “seas” are old lava flows, but are still young compared to the more cratered surface, and they have a slight blue hue. Finally, ejected material from recent impacts stand out as white rays against the older surface. All of this is far too subtle to be captured in a single image, but if we stack enough, then we get enough data to tease out these differences.
To do this, I used an 80mm refractor on a driven mount and an Atik GP colour camera. After focusing, the program GP Acquire was used to capture 1000 frames of video. This video was fed into the program RegiStax for alignment and stacking. Registax is fully featured with many excellent tutorials available, so I will skip the details and just say that the individual frames were aligned. Then, the best quality 20% combined colour information was removed and sharpened to form the luminance layer of the image.
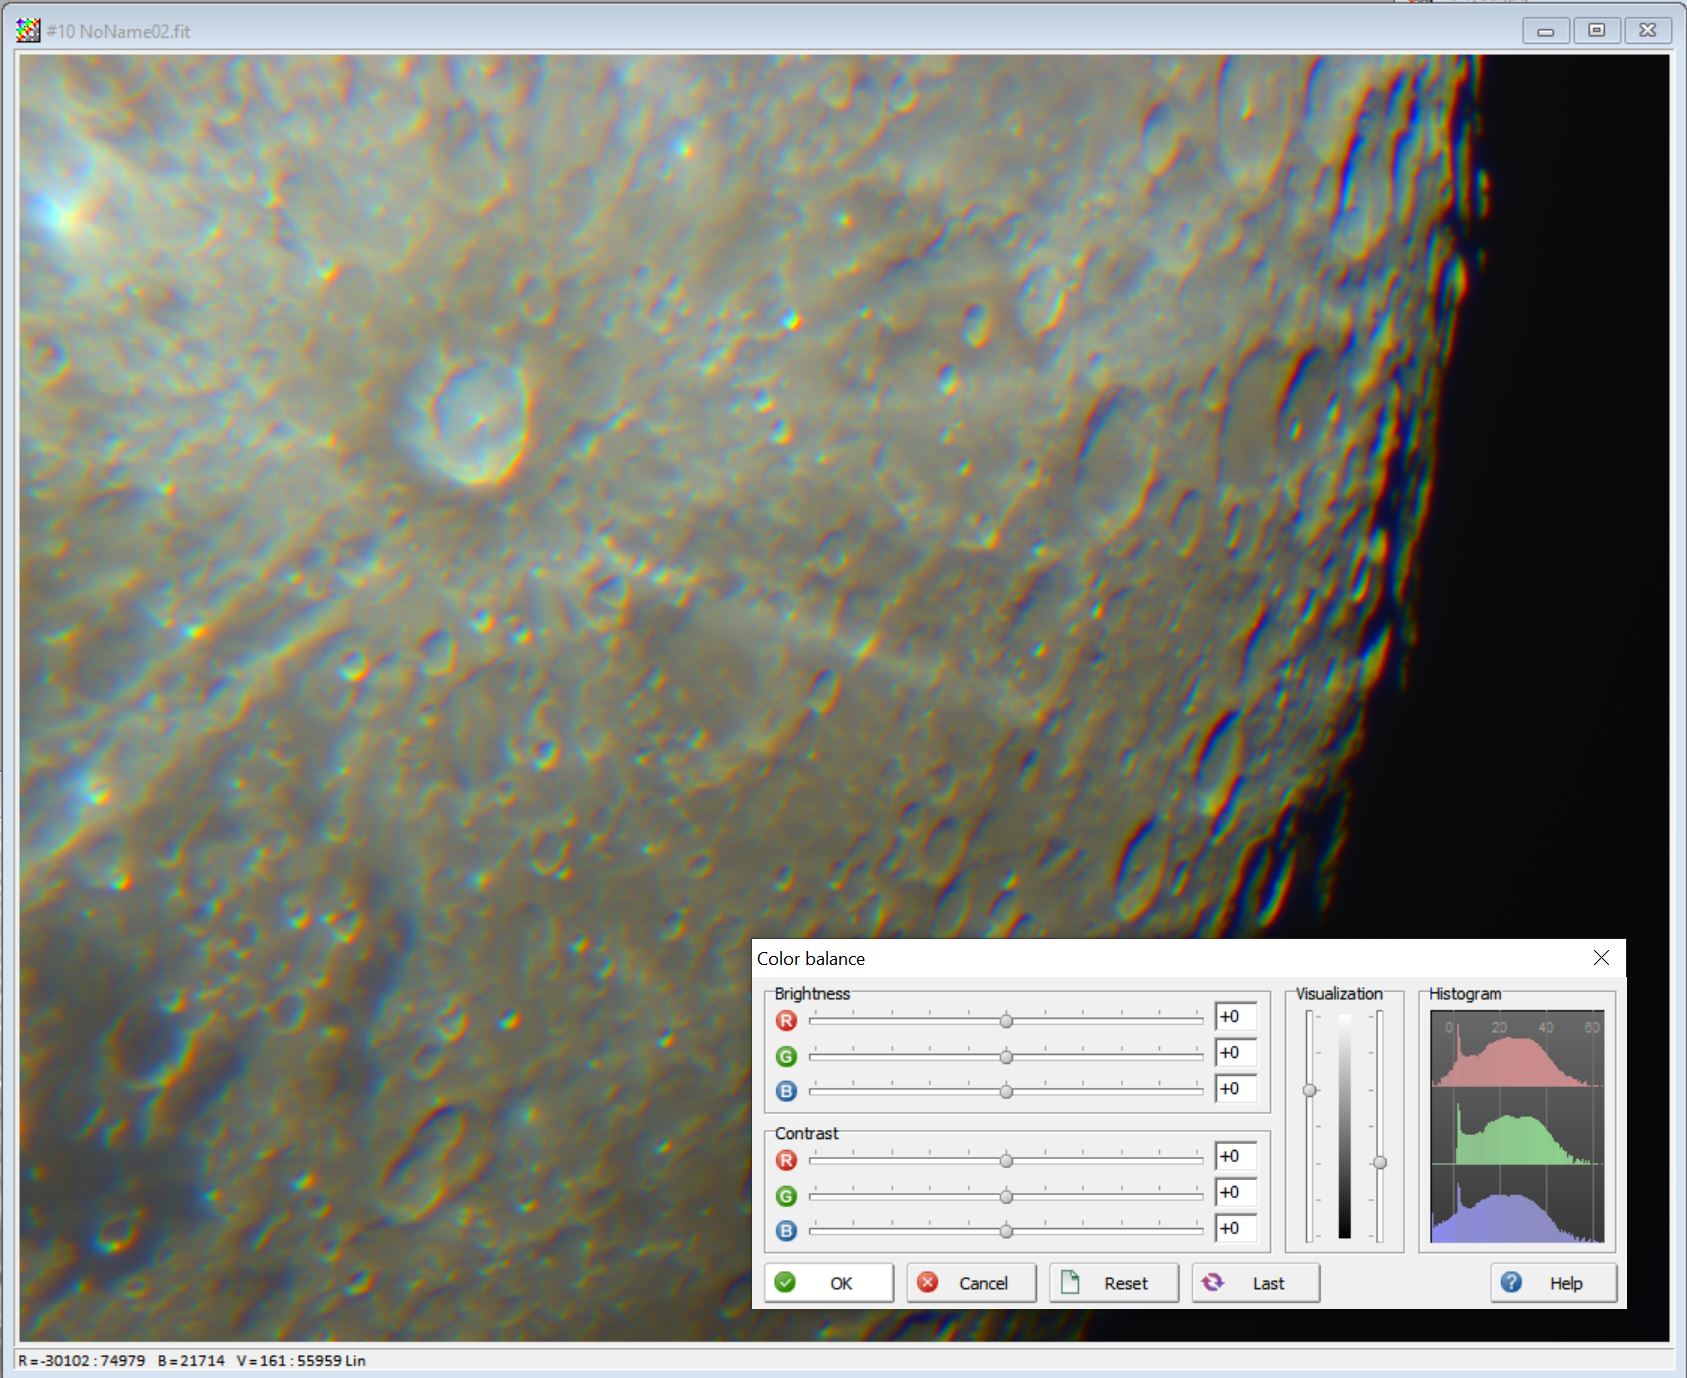
We don’t need sharpness to get colour data, but we do need masses of dynamic range. So, all the frames were combined and saved without sharpening in a 16bit Tiff.
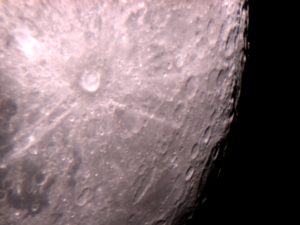
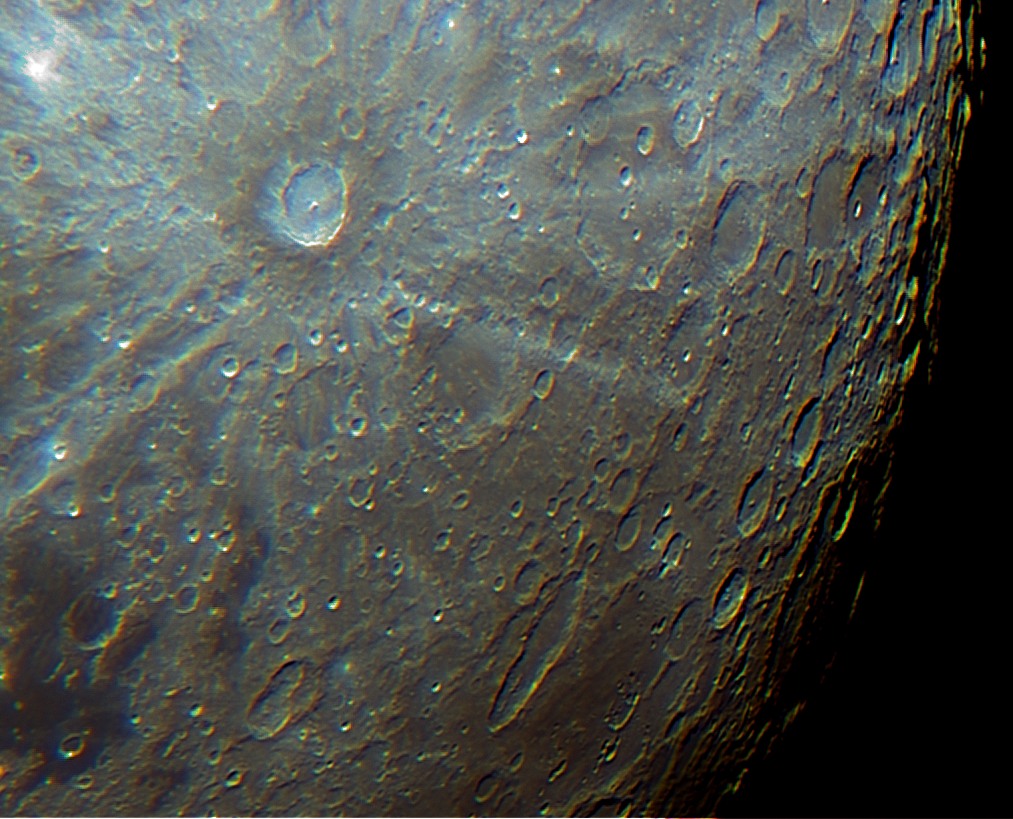
As you can see, this colour image is an uninspiring blurred purple thing! Astroart was used to do the final processing, but Photoshop or other programs could be used. It’s important to do the colour correction a little at a time. First adjust the RGB levels to produce a neutral looking image. Then increase the saturation. After a few rounds of this, some colour differences should start to appear, although the image is still very blurry.
Now, bring in the luminance image and layer it over the colour data. The result should be a high resolution colour image of the moon!
Become an Astronaut
This idea is a bit more fun. The moon’s surface will appear to glide through the field of view, if viewed through a telescope at high magnification and no tracking, or with tracking turned off. It’s a bit like watching the surface through a spacecraft window.
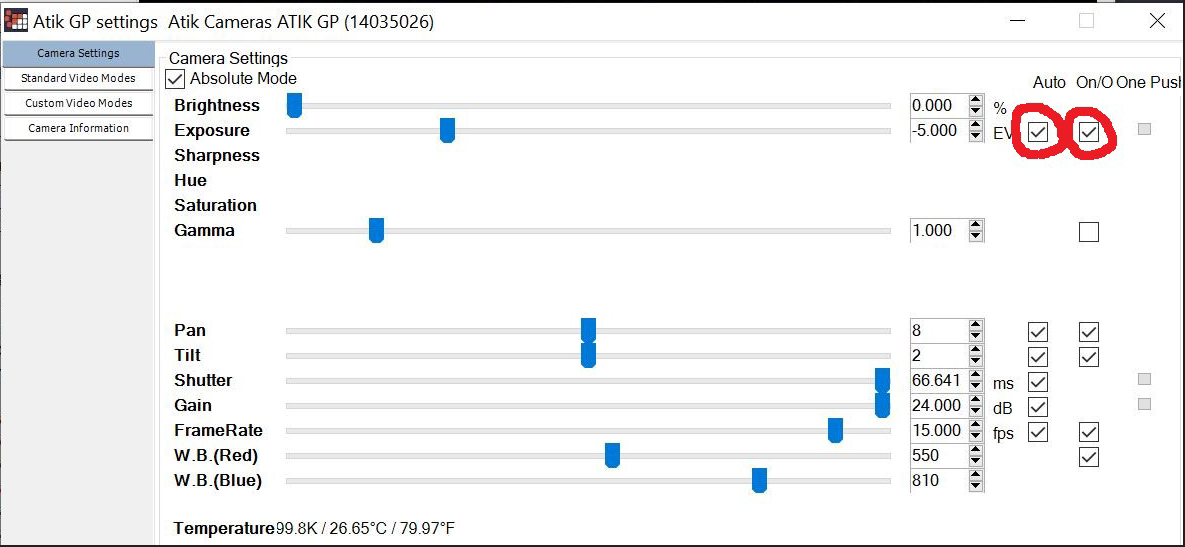
First we need some raw footage of the moon going through the field of view. We can start off with the moon outside the camera’s view, then record it drifting through, and out the other side. The video will start off dark, become bright when the moon is fully in view, and become dark again as it drifts out of view. It can be useful to stop the camera using auto exposure. Start with the moon fully in view and uncheck the boxes circled in the camera settings dialogue.
Move the telescope to its start position and start recording when the moon drifts through. Then stop the recording.
Next we need a picture of a spacecraft window. There is a huge archive of images taken during the Apollo missions at https://www.flickr.com/photos/projectapolloarchive/
The one I selected was the command module hatch window from Apollo 12.
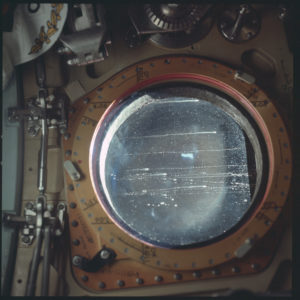
In order to use the “green screen” effect we need to cut out the section of the image with the window. This can be done with the Paint3D app in Windows 10 or many other programs. Use the magic selection feature to delete the portion of the image with the window, and use the paint fill command to replace it with a solid colour.
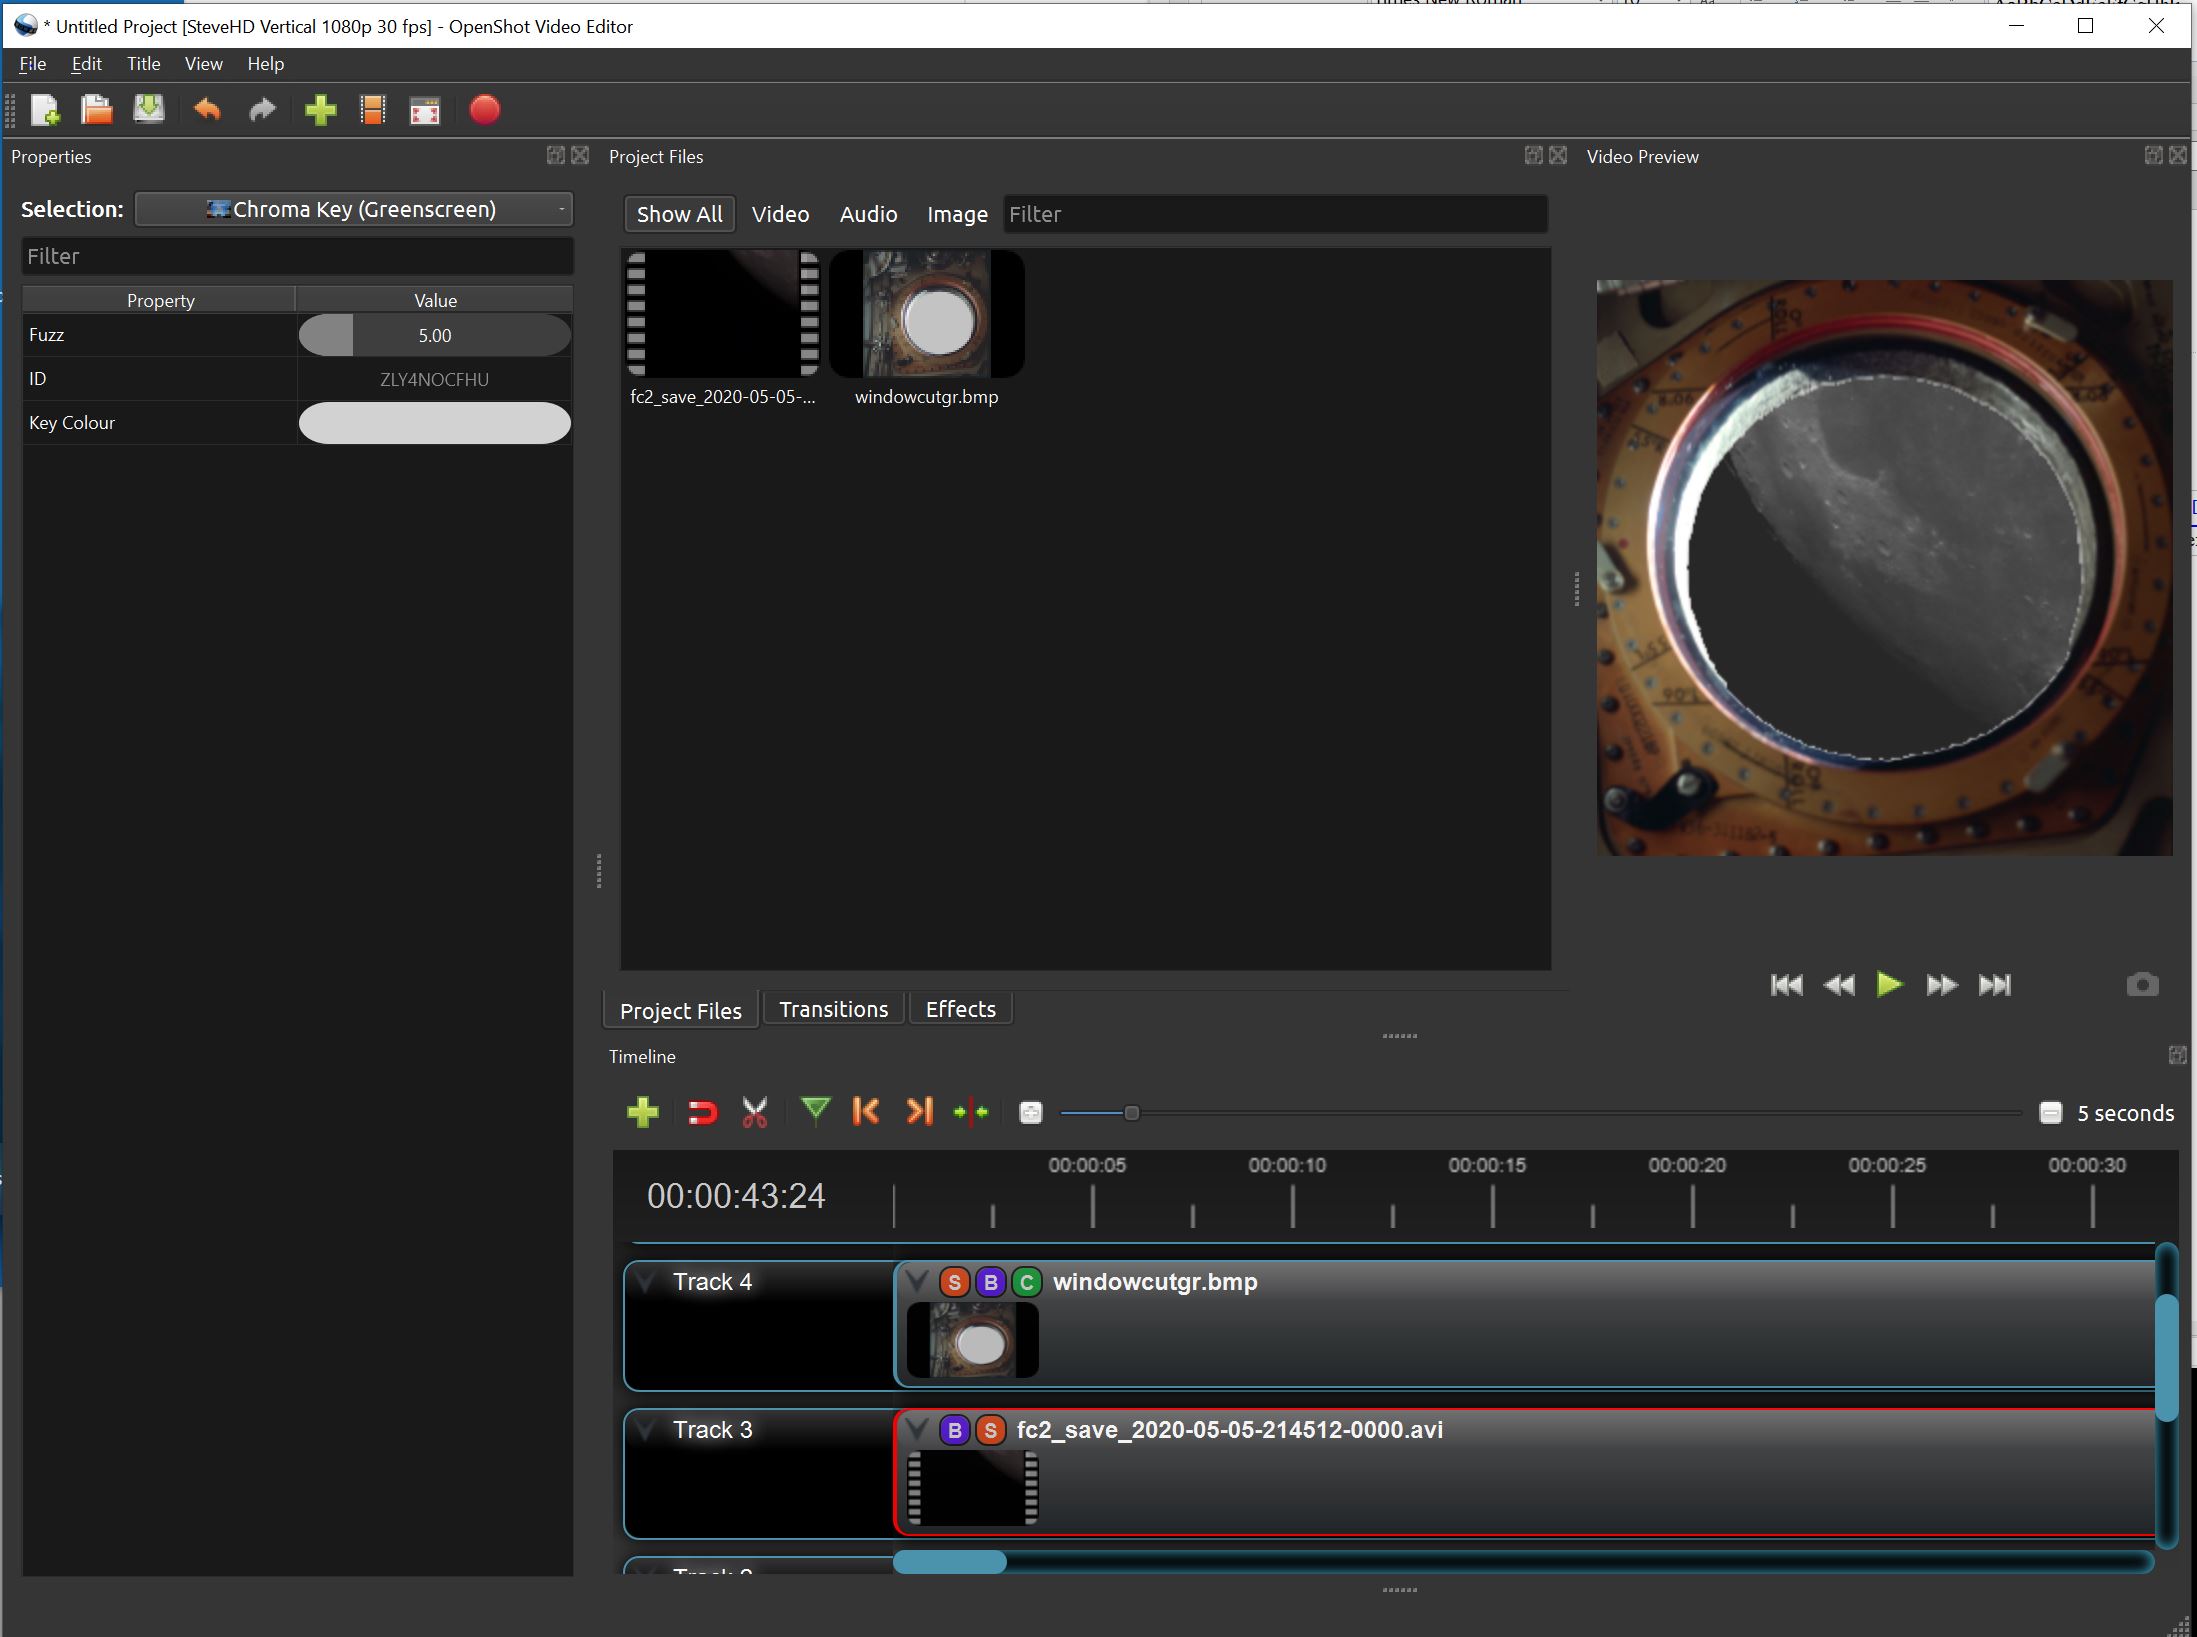
Most movie editing programs offer a colour key effect, but I used the freeware OpenShot editor. Place the picture in one track and the moon video in the track below. Then, add the Key effect and select the colour to be the same as was used to fill the window.
All that’s left is to render the video and save to disk.
For added realism, you can add sound from the Apollo mission audio that has been archived. (A bit of camera shake can also help with the illusion.) Have fun!